Howdy do,
This is follow up to the previous article/entry on the NZFS, but this one will be focusing on the actual photography rather than the article.
First thing: I travel light. I dislike big heavy backpacks slung over both shoulders and the more I’ve been doing this, the more I’ve streamlined the gear in the bag. The first thing on 99% of the shoots/gigs is a 24-70 2.8 L. On a full frame camera it covers a very useful focal length, has a fast constant aperture, lovely bokeh, sharp as a tack, seemingly immortal, fast focusing… basically it’s been the workhorse for the past 6 years. The second thing that goes in is a fast, longer prime lens. Usually for portraits but also very handy at events for detail shots and picking things/people out of a crowd. 75% of the time it’s a 135mm f/2 L, the other times it’s an 85mm. Beyond that it’s a flash (just in case), all the wireless triggers and receivers, a white balance card, and generic stuff like spare batteries, colored gels (CTO and CTB) and that’s about it. Easy, portable.
Second thing: I use lighting on 90% of the shoots I do. The only times I don’t are at events, or things like landscapes or a rare outdoor shoot where natural is required and/or preferred. I’m a huge proponent of lighting and seriously, as a photographer, the world opens up when you can get the flash off the camera. It’s one of those whoa moments when you suddenly have the ability to control everything. Back in the day when natural light had to be used, you’re at the mercy of sun and clouds and limited to where and when you can shoot. In the commercial field you can’t call off a shoot because the light isn’t playing ball with your plans.
I’m waffling.
The lighting.
It’s so utterly simple. One light. One lens. One subject.
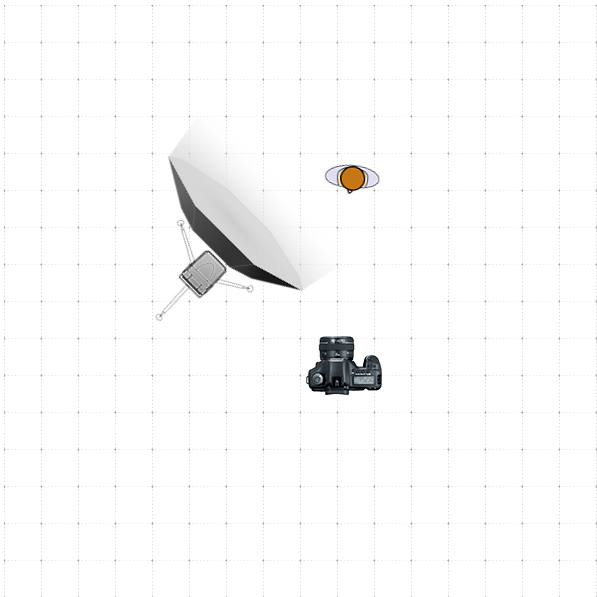
That’s a big octabox to the camera left at around 40 degrees, camera with a 135mm and the person looking right down the barrel. The light is a bit above head height and set so it throws some light on the background. The scene naturally shot would be underexposed -1 so there’s some ambient light coming into the scene but the light’s job is to light the entire subject, a bit of the background and look good doing it. I try and point the very centre of the light just off-axis to the person to hopefully avoid the hot-spots that generally come along with pointing the centre of the light at someone. You can get around this with a second diffusion panel inside the diffuser, but I lost the one for this octabox years ago.
The above lighting diagram looks like this:

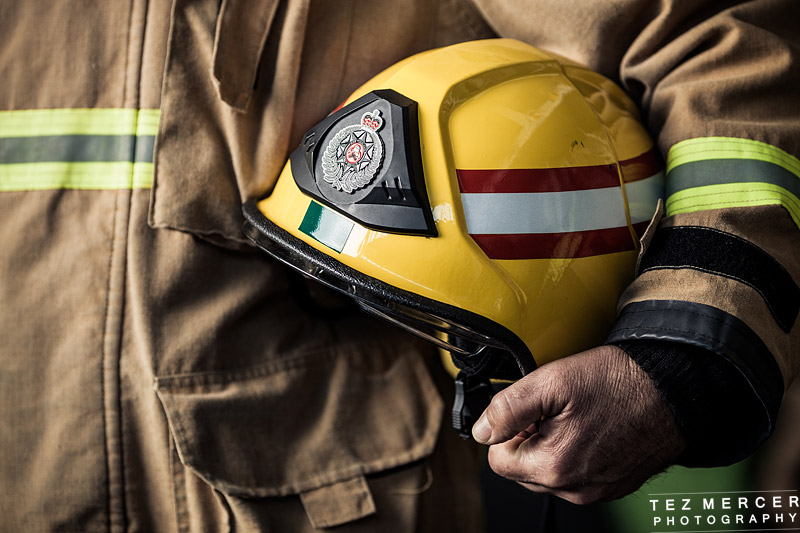
Senior Station Officer Jake Kennedy
Shot with a 135mm at f/2.5. It’s a gorgeous lens, it even makes this guy look good. Nothing fancy to it at all. Which was deliberate. Me and Geoff the video genius from 2dProductions wanted to keep it natural looking, not glitzy, or processed or glamourised, just an honest portrayal of these great people. That objective in mind determined the lighting style and setup for the shot. That background was picked to set the scene, not a plain white background, or a plain wall, but a setting unique to the fire station with a colour palette that totally fits in with what we’re shooting. If you think about it, some other backgrounds wouldn’t make a lot of sense but this one just fit the bill and I also dug the diagonals receding into the distance. If this was a more commercial shoot, or more stylized, I would have thrown some rim lights around the back sides to provide some hard edge lighting – something you see commonly in sports photography, or action movie posters – it’s a great way to add an instant badass look to someone and like all things, sometimes it fits and sometimes it doesn’t. It probably would’ve looked pretty cool here but to me that would be getting away from what I’m there for. So, one light pointed at a firefighter.

The detail shots, and shots inside the truck, we’re all done with the 24-70. It focuses pretty closely so for closeup details it’s great.
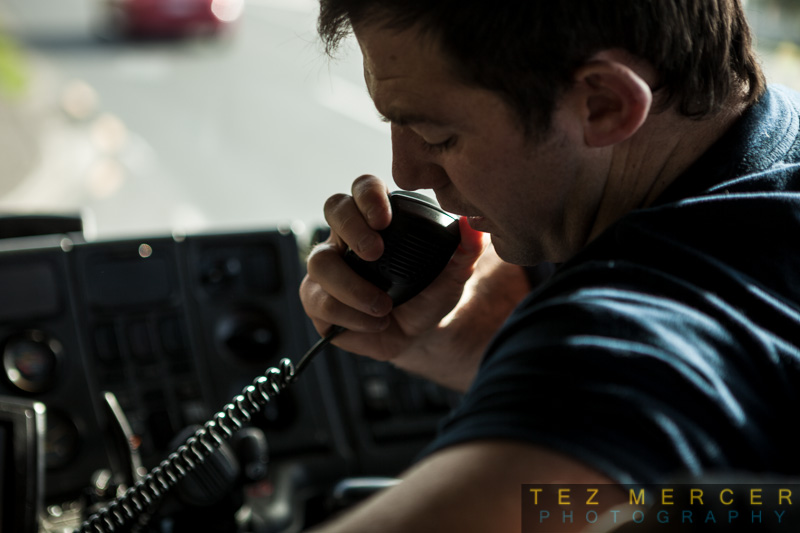
McCartney on the radio with dispatch
That’s the old watermark. Ha. Anyway. I shot this from the observer’s seat (fire trucks have 5 seats – 4 for crew, one for the observer) which is facing the rear view mirror. Kev was speaking with dispatch in code, I shot this at 70mm, around ISO 1600. Just picked up the camera and blam. It’s the only shot I have from the cab, the other work I did was recording some video for the NZFS vid I hope you’ve checked out.
Editing.
I made a post a while back about white balance and how it can be utilised for effect. Warm, cold, desolate, summery, you can implant a feeling into a photo with colour tinting and white balance is one of the ways to do this. I generally shoot most things quite warm, around 6000k. A little thing I always seem to do is to add a very very very slight tint to the whites of an image to warm it up slightly and smooth everything out. Obviously this wouldn’t work for product photography or other projects where colour reproduction and accuracy are imperative but it really helps skin tones. It isn’t frequency separation or anything hardcore, but it’s a finishing touch I apply to most of my images containing people.

Senior Firefighter Dean Olsen
The method is again really really simple and I’ve done it so many times it’s autopilot for me. Push ctrl+j, then ctrl+u. This duplicates the layer and opens up the good ol’ hue/saturation palette which will only affect the layer you just made. Set it to ‘colorize’ then input 52/11 in hue and saturation respectively. It turns everything kinda brown. That’s good. Push ok. Set that layer to colour and roll back the opacity to around 8% or thereabouts. It’s subtle but I find it really helps even out the tones and apply a little tonal augmentation. As with all things in Photoshop there are a thousand ways of achieving the same result, this is one I’ve found that works for me.